网中的小鱼

wzdxy


  • 首页

  • 标签

  • 归档

  • 关于

  • 留言板

  • 搜索

当你遇到一个年久失修的npm包有bug时...

发表于 2020-12-16 | | 阅读次数:

1.

Node.js使用QConf踩坑记录(CentOS)

发表于 2020-12-07 | | 阅读次数:

一、安装QConf客户端(如果服务器上已安装可以跳过此步骤)

1、安装CMake (如果已安装可以跳过)

1.1 准备编译环境

1
yum -y install gcc gcc-c++

1.2 获取源码,并解压

1
2
3
wget https://github.com/Kitware/CMake/releases/download/v3.19.1/cmake-3.19.1.tar.gz
tar -zxf cmake-3.19.1.tar.gz
cd cmake-3.19.1

1.3 编译安装

1
2
3
./bootstrap --prefix=/usr --datadir=share/cmake --docdir=doc/cmake && make
sudo make install
cmake --version # 检查是否正确安装

2、安装 QConf

1
2
3
4
5
6
git clone git@github.com:Qihoo360/QConf.git  (如果没有权限可以直接去 Github 主页下载 zip 包)
cd QConf/
mkdir build && cd build
cmake ..
make
make install

3、启动

1
/usr/local/qconf/bin/qconf_agent

结尾可能出现 Failed to get conf! 是一个 WARNING,可以暂时忽略,已经启动成功了。

二、在 Node.js 调用

1、在项目中安装 node-qconf

首先配置环境变量

1
export QCONF_INSTALL=/home/work/local/qconf

安装依赖

1
npm install node-qconf

2、调用

1
2
3
4
5
6
7
8
// qconf.js
console.log('启动')
try {
var qconf = require('node-qconf')
console.log('version:', qconf.version())
} catch (e) {
console.error(e)
}

qconf 的错误处理不太完善,又十分依赖本机环境,容易出现程序直接中断而没有报错的情况。因此需要 try catch (包括 require(‘node-conf’) 语句)

三、常见问题

Q:报错:Error: QConf init failed: 201

A:大概率是因为 QConf 没有启动 (参考 https://github.com/Qihoo360/QConf/issues/22)

Q:npm 安装 node-qconf 报错:

1
2
3
4
../qconf.cc:2:19: fatal error: qconf.h: No such file or directory
#include <qconf.h>
^
compilation terminated.

A:安装 node-qconf 前,需确保 QConf 已经被正确安装,并配置了 QCONF_INSTALL 环境变量

Q:require('node-qconf') 报错:

1
2
3
4
5
6
7
8
9
10
11
Error: libqconf.so: cannot open shared object file: No such file or directory
at Object.Module._extensions..node (internal/modules/cjs/loader.js:731:18)
at Module.load (internal/modules/cjs/loader.js:612:32)
at tryModuleLoad (internal/modules/cjs/loader.js:551:12)
at Function.Module._load (internal/modules/cjs/loader.js:543:3)
at Module.require (internal/modules/cjs/loader.js:650:17)
at require (internal/modules/cjs/helpers.js:20:18)
at Object.<anonymous> (/home/wwwroot/acs-platform-server/node_modules/node-qconf/qconf.js:1:80)
at Module._compile (internal/modules/cjs/loader.js:702:30)
at Object.Module._extensions..js (internal/modules/cjs/loader.js:713:10)
at Module.load (internal/modules/cjs/loader.js:612:32)

A:找不到libqconf.so文件,需要在/usr/lib或/usr/lib64下创建libqconf的软连接

1
sudo ln -s /usr/local/qconf/lib/libqconf.so /usr/lib64/libqconf.so

参考链接:

https://github.com/Qihoo360/QConf

https://github.com/Qihoo360/QConf/blob/master/doc/Qconf%20Node%20Doc.md

https://github.com/bluedapp/node-qconf

微信小程序多人协作工作流程

发表于 2020-12-05 | | 阅读次数:

Typescript在开发中的体验提升

发表于 2020-11-06 | | 阅读次数:

1. 标记参数和返回值,方便维护

1
2
3
4
5
6
7
8
9
10
11
12
// login
function checkUserLogin() {
const configData = this.getUserConfig()
if (configData.username) {

}
}

// user-config.js
function getUserConfig() {
// do something and return userConfig
}
1
2
3
4
5
6
7
8
9
10
11
12
13
14
interface UserConfig {
username: String
uid: Number
}

function checkUserLogin() {
const userConfig:UserConfig = this.getUserConfig()
console.log(configData.name)
}

// user-config.js
function getUserConfig:UserConfig() {
// do something and return userConfig
}

2. 代码补全

声明文件 d.ts

其实我们一直在用 ts

VSCode 对 d.ts 的支持

Automatic Type Acquisition 功能,会将自动下载社区中流行的 @types

Webstorm 对 d.ts 的支持

自动

对于自己的库,可以编写自己的 d.ts,发布到 @types/ 下

1
2
3
4
5
6
7
8
9
10
11
12
13
14
15
16
17
18
19
20
21
22
23
// @types/xxx/index.d.ts
declare namespace $ACS {
/**
* 工具方法
*/
export const utils: {
/**
* 是否处于微信小程序
*/
isMini(): Boolean
/**
* 当前是否处于APP内
*/
isApp(): Boolean
/**
* 获取当前所在的联调、测试、本地、线上、预发布等环境及域名信息
*/
getEnv(): {
env: 'local-dev'|'online'|'pre'|'test'
mHost: String
}
}
}

uniapp微信小程序自动页面埋点和曝光埋点踩坑

发表于 2020-10-26 | | 阅读次数:

基本功能介绍

页面埋点

在页面的 onShow 勾子函数中上传埋点数据

曝光埋点

利用小程序提供的 createIntersectionObserver API, 监听元素露出屏幕的事件,并触发回调(参数为元素的相关信息),由业务组件在回调中自己上传埋点数据。

1
2
3
4
5
6
7
8
9
10
11
12
13
14
15
16
17
18
19
20
21
22
23
24
25
26
27
28
29
30
31
32
33
34
export class Exposure {
constructor(selector, callback, vm, options) {
this.callback = callback
this.selector = selector
this.lockTimer = null
if (options) {
this.bottom = options.bottom || 0
this.top = options.top || 0
}
this.init(vm) // 为什么把vm传来传去而不用this.vm:因为会出现循环引用导致报错
}

/**
* 初始化
* @param vm 组件的 $vm 实例 (vue 实例)
*/
init(vm) {
// 创建 IntersectionObserver 的实例
this.ob = vm
? vm.createIntersectionObserver({ observeAll: true })
: uni.createIntersectionObserver(null, { observeAll: true })
// 开始监听,当露出时触发回调
this.ob
.relativeToViewport({
bottom: this.bottom,
top: this.top
})
.observe(this.selector, (result) => {
if (result.intersectionRatio > 0) {
this.callback(result)
}
})
}
}

由于业务需求,页面埋点和曝光埋点还需要有以下逻辑

1. 进入页面时(用户未操作),立即触发页面埋点和曝光埋点

2. 跳到其他页面再返回时,需要再次触发页面埋点和当前在屏幕露出的元素的埋点

页面埋点很容易处理,而曝光埋点很麻烦,因为 IntersectionObserver 只能监听元素可见性变化,无法静态获取是否露出元素,因此需要在每个页面监听 onHide 和 onShow 事件,在 onHide 时销毁所有监听实例,在 onShow 时重新监听(因为 IntersectionObserver 创建时会默认触发一次事件,即可达到重新触发曝光的目的)
但如果这些逻辑放在业务代码中,非常繁琐且重复,因此使用全局 mixin 处理。

二、 全局 mixin

  • 页面埋点

    每次 onShow 时都触发一次页面埋点

  • 曝光埋点

    首次 onShow 时初始化曝光埋点(初始化不在此控制,因为加载时机不同,所以放在在业务逻辑中)并将曝光埋点实例存在 exposureObservers 中以备后用;同时标记 isPageFirstLoad 为 false

    每次 onHide 时销毁所有曝光埋点

    下次 onShow 时,遍历并调用 exposureObservers 中的所有实例的 reInit 方法

Mixin代码:

1
2
3
4
5
6
7
8
9
10
11
12
13
14
15
16
17
18
19
20
21
22
23
24
25
26
27
28
29
30
31
32
33
34
35
36
37
38
39
40
41
42
43
44
45
46
47
48
/**
*
*/
import { reportData } from '@/common/report-data'

/**
* 曝光埋点
*/
export const pageAndExposureObservers = {
data() {
return {
exposureObservers: [], // 用于存储曝光埋点
isPageFirstLoad: true // 标记页面是否第一次加载
}
},
onShow() {
console.log(
this.route,
'=====================onShow 前========================'
)
console.log(
this.route,
'=====================onShow 后========================'
)
// 1. 首次和之后每次显示页面。发送页面埋点(从页面组件的 pageTrackConfig 中读取数据)
if (typeof this.pageTrackConfig === 'undefined') {
const pageTrackConfig = this.$options.pageTrackConfig
let dataForReport
if (typeof pageTrackConfig === 'function') {
dataForReport = { type: 3, ...pageTrackConfig.call(this) }
} else if (typeof pageTrackConfig === 'object' && pageTrackConfig.info) {
dataForReport = { type: 3, ...pageTrackConfig }
} else if (typeof pageTrackConfig === 'string') {
dataForReport = { type: 3, info: pageTrackConfig }
}
dataForReport && reportData(dataForReport)
}
// 2.如果是从其他页面切换,重新初始化曝光埋点
if (!this.isPageFirstLoad) {
this.exposureObservers.forEach((item) => item.reInit(this))
}
this.isPageFirstLoad = false
},
onHide() {
// 2.页面隐藏时,销毁所有曝光
this.exposureObservers.forEach((item) => item.disconnect(this))
}
}

Exposure修改为:

1
2
3
4
5
6
7
8
9
10
11
12
13
14
15
16
17
18
19
20
21
22
23
24
25
26
27
28
29
30
31
32
33
34
35
36
37
38
39
40
41
42
43
44
45
46
47
48
49
50
51
52
53
54
55
56
57
58
59
60
61
62
63
64
65
66
67
68
69
70
71
72
73
74
75
export class Exposure {
constructor(selector, callback, vm, options) {
this.callback = callback
this.selector = selector
this.lockTimer = null
if (options) {
this.bottom = options.bottom || 0
this.top = options.top || 0
}
this.init(vm) // 为什么把vm传来传去而不用this.vm:因为会出现循环引用导致报错
}

/**
* 初始化
* @param vm 组件的 $vm 实例 (vue 实例)
*/
init(vm) {
// 创建 IntersectionObserver 的实例
this.ob = vm
? vm.createIntersectionObserver({ observeAll: true })
: uni.createIntersectionObserver(null, { observeAll: true })
// 切断循环引用,防止报错
this.ob._component = null
// 开始监听,当露出时触发回调
console.log({ bottom: this.bottom, top: this.top })
this.ob
.relativeToViewport({
bottom: this.bottom,
top: this.top
})
.observe(this.selector, (result) => {
if (result.intersectionRatio > 0) {
this.callback(result)
}
})
// push 到当前页面组件的 exposureObservers 数组中
this.getRootPageComponent(vm).exposureObservers.push(this)
}

/**
* 销毁所有监听
*/
disconnect(vm) {
this.ob.disconnect()
const rootPageComponent = this.getRootPageComponent(vm)
const index = rootPageComponent.exposureObservers.indexOf(this)
if (index) {
rootPageComponent.exposureObservers.splice(index, 1)
}
}

/**
* 重新监听所有曝光埋点
* @param vm
*/
reInit(vm) {
this.disconnect(vm)
this.init(vm)
}

/**
* 获取组件所属的最上层组件(页面组件)
* @param vm
* @returns {*}
*/
getRootPageComponent(vm) {
if (vm.mpType === 'component') {
return this.getRootPageComponent(vm.$parent)
} else if (vm.mpType === 'page' || vm.$parent === undefined) {
return vm
} else {
return vm
}
}
}

三、坑:iOS微信bug导致页面和曝光不准

1. 问题描述

iOS版本微信存在一个问题:从一个非TabBar页面A切换到TabBar页面B时,如果TabBar当前不处于目标页面B,会先短暂展示一下当前TabBar所在页面C,然后再切换到B。

结果就是页面C的 onShow 和 onHide 被执行,导致多发送一次页面和一批曝光事件。

除此之外,当二次复现此路径时,还会额外多触发一次B埋点,也就是发送2次B埋点。

相关链接
https://developers.weixin.qq.com/community/develop/doc/000ea812d54ab0cfea3a23eaf51400

2. 解决方案

过滤页面埋点

在调用 switchTab 前,记录全局变量 isSwitchingTab(表示当前正在切换TAB)

1
Vue.prototype.isSwitchingTab = 'pages/shopping-cart'

在全局 mixin 的 onShow 方法中,判断这个变量,如果当前页面路由和 isSwitchingTab 的值相同,才认为当前是真正想跳转的页面,而不是由于 bug 短暂展示的页面。这样就过滤掉了本就不应该触发的C页面的 onShow。
同时,在进入B页面 onShow 后,延迟2s清除 isSwitchingTab ,防止影响下次跳转。

1
2
3
4
5
6
7
if (
Vue.prototype.isSwitchingTab === undefined ||
this['__route__'] === Vue.prototype.isSwitchingTab
) {
setTimeout(() => (Vue.prototype.isSwitchingTab = undefined), 2000)
// 下面继续埋点逻辑
}

此处还有一个点需要注意:在使用 getCurrentPages() 获取的页面栈中,并不包含C页面,只能在 this[__route__] 中读取当前页面的 route 属性。这说明对于微信小程序来说,C页面的意外展示是不被承认的,毕竟它连一个痕迹都木有留下。

过滤重复发送的B埋点

在发送埋点时,判断当前页面是否刚刚发送埋点,如果2s内有发送过,就不再发送

1
2
3
4
5
6
7
8
9
10
11
// 防止重复曝光
if (
dataForReport &&
Vue.prototype.CurrentPageForMaidian !== dataForReport.info
) {
dataForReport && reportData(dataForReport)
Vue.prototype.CurrentPageForMaidian = dataForReport.info
setTimeout(() => {
Vue.prototype.CurrentPageForMaidian = undefined
}, 2000)
}

四、最终代码

Mixin代码

1
2
3
4
5
6
7
8
9
10
11
12
13
14
15
16
17
18
19
20
21
22
23
24
25
26
27
28
29
30
31
32
33
34
35
36
37
38
39
40
41
42
43
44
45
46
47
48
49
50
51
52
53
54
55
56
57
58
59
60
61
62
63
64
65
66
67
68
69
70
71
import { reportData } from '@/common/report-data'
import Vue from 'vue'

/**
* 曝光埋点
*/
export const pageAndExposureObservers = {
data() {
return {
exposureObservers: [], // 用于存储曝光埋点
isPageFirstLoad: true // 标记页面是否第一次加载
}
},
onShow() {
console.log(
'当前页面栈',
getCurrentPages()
.map((i) => i.route)
.join(' ====> ')
)
const currentPages = getCurrentPages()
const currentPage = currentPages[currentPages.length - 1]
const currentRoute = currentPage ? currentPage.route : false
console.log(currentRoute, '===========onShow==========')
if (
Vue.prototype.isSwitchingTab === undefined ||
this['__route__'] === Vue.prototype.isSwitchingTab
) {
// 为了处理 ios switch tab 的bug,记录当前正在切换的页面
setTimeout(() => (Vue.prototype.isSwitchingTab = undefined), 2000)
// 1. 首次和之后每次显示页面。发送页面埋点(从页面组件的 pageTrackConfig 中读取数据)
if (typeof this.pageTrackConfig === 'undefined') {
const pageTrackConfig = this.$options.pageTrackConfig
let dataForReport
if (typeof pageTrackConfig === 'function') {
dataForReport = { type: 3, ...pageTrackConfig.call(this) }
} else if (
typeof pageTrackConfig === 'object' &&
pageTrackConfig.info
) {
dataForReport = { type: 3, ...pageTrackConfig }
} else if (typeof pageTrackConfig === 'string') {
dataForReport = { type: 3, info: pageTrackConfig }
}

// 防止重复曝光
if (
dataForReport &&
Vue.prototype.CurrentPageForMaidian !== dataForReport.info
) {
dataForReport && reportData(dataForReport)
Vue.prototype.CurrentPageForMaidian = dataForReport.info
setTimeout(() => {
Vue.prototype.CurrentPageForMaidian = undefined
}, 2000)
}
}
// 2.如果是从其他页面切换,重新初始化曝光埋点
if (!this.isPageFirstLoad) {
this.exposureObservers.forEach((item) => item.reInit(this))
console.log('reInit this.exposureObservers', this.exposureObservers)
}
}

this.isPageFirstLoad = false
},
onHide() {
// 2.页面隐藏时,销毁所有曝光
this.exposureObservers.forEach((item) => item.disconnect(this))
}
}

Exposure

1
2
3
4
5
6
7
8
9
10
11
12
13
14
15
16
17
18
19
20
21
22
23
24
25
26
27
28
29
30
31
32
33
34
35
36
37
38
39
40
41
42
43
44
45
46
47
48
49
50
51
52
53
54
55
56
57
58
59
60
61
62
63
64
65
66
67
68
export class Exposure {
constructor(selector, callback, vm, options) {
this.callback = callback
this.selector = selector
this.lockTimer = null
if (options) {
this.bottom = options.bottom || 0
this.top = options.top || 0
}
this.init(vm) // 为什么把vm传来传去而不用this.vm:因为会出现循环引用导致报错
this.getRootPageComponent(vm).exposureObservers.push(this) // push 到当前页面组件的 pageAndExposureObservers 数组中
}

/**
* 初始化
* @param vm 组件的 $vm 实例 (vue 实例)
*/
init(vm) {
// 创建 IntersectionObserver 的实例
this.ob = vm
? vm.createIntersectionObserver({ observeAll: true })
: uni.createIntersectionObserver(null, { observeAll: true })
// 开始监听,当露出时触发回调
// 开始监听,当露出时触发回调
this.ob
.relativeToViewport({
bottom: this.bottom,
top: this.top
})
.observe(this.selector, (result) => {
if (result.intersectionRatio > 0) {
this.callback(result)
}
})
// 切断循环引用,防止报错(此语句必须放在.observe之后,否则会找不到组件内的元素)
this.ob._component = null
}

/**
* 销毁所有监听
*/
disconnect() {
this.ob.disconnect()
}

/**
* 重新监听所有曝光埋点
* @param vm
*/
reInit(vm) {
this.init(vm)
}

/**
* 获取组件所属的最上层组件(页面组件)
* @param vm
* @returns {*}
*/
getRootPageComponent(vm) {
if (vm.mpType === 'component') {
return this.getRootPageComponent(vm.$parent)
} else if (vm.mpType === 'page' || vm.$parent === undefined) {
return vm
} else {
return vm
}
}
}

五、调用方法

页面埋点

在页面组件中定义 pageTrackConfig 属性即可,无需额外处理
支持 String 和 Function

1
2
3
4
5
6
7
8
9
10
// string
export default {
pageTrackConfig: 'hnav_home_page',
}
// function,返回复杂的埋点信息
export default {
pageTrackConfig() {
return { info: 'plist_product_detail_page', ext: { product_id: this.pid }}
},
}

曝光埋点

1
2
3
4
5
6
7
8
9
10
11
12
13
14
15
16
17
18
19
20
21
22
23
24
25
// 参数:选择器(支持多个),曝光回调,当前组件实例(即this)
// 可以在回调参数中读取 dom 的 dataset 等属性
this.$registerExposure(
'.tofu .leaf-node',
(result) => {
// 在回调中发送埋点,可以通过 result 的 id和 dataset 获取信息,dataset就是DOM上的 data-xx=xx
this.$reportData({
info: 'hnav_homepage_tofu_exposure',
ext: {
serial_num: result.dataset.num
}
})
},
this
)

// 支持传递触发阈值,如被吸底的价格条遮挡的情况:
this.$registerExposure(
'.section.rights',
() => {
this.$reportData({ info: 'plist_productdetail_policy_exposure' })
},
this,
{ bottom: -60 }
)

VSCode中的油猴--powertools插件试用

发表于 2020-09-09 | | 阅读次数:

简介

Power Tools 是一个 VSCode 插件, 可以让用户随时编写自己的脚本, 并能很方便地在 VSCode 中运行, 而且支持 VSCode 扩展的 API.
下面来使用 Power Tools 实现一个半自动 px 转 rpx 的快捷功能.

使用条件

  • VSCode
  • Power Tools 插件

一、 安装

直接从 ego-digital.vscode-powertools 安装
或在VSCode中搜索

阅读全文 »

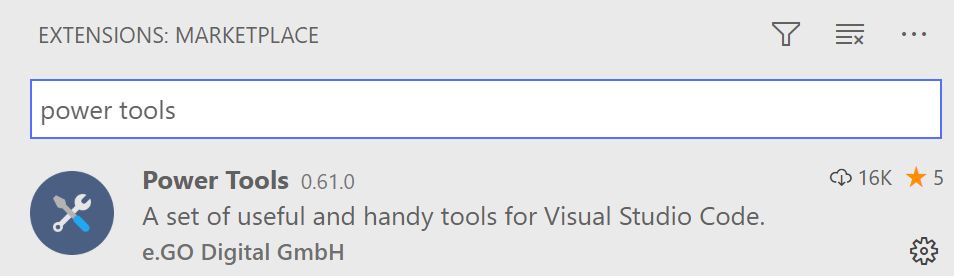
使用AST实现自动配置WebPack接口代理

发表于 2020-07-24 | | 阅读次数:

背景

在开发物料平台的过程中, 为了提升物料开发的效率, 对 api 接口做了约定, 将物料用到的接口都配置到同一个 js 文件内.按照变量名划分.

1
2
3
4
5
6
7
8
9
10
11
12
const mApi = {
getList: (params) => axios.get("/api/get-list", params),
setItem: (params) =>
axios({
method: "post",
url: "/api/set-item",
}),
};
const adminApi = {
getList: (params) => axios.get("/admin-api/get-list", params),
};
export { mApi, adminApi };

为了减少操作, 打算根据这个文件自动配置代理.

阅读全文 »

Typescript入坑指南

发表于 2019-12-22 | | 阅读次数:

用命令行编译 ts 文件

1
2
3
4
# 安装
npm i typescript -g
# 编译
tsc hello.ts

在 VSCode 中直接调试 TS 文件

阅读全文 »

electron踩坑记录之一:开发环境搭建

发表于 2019-12-16 | | 阅读次数:

环境要求

  • Node.js
  • VSCode (建议)

新建项目, 安装依赖

1
2
npm init # 在空文件夹中初始化项目
npm i electron -D # 安装 electron 依赖, 注意需要安装为 devDependencies
阅读全文 »

Flutter Alignment 属性总结和应用(雪碧图)

发表于 2019-09-28 | | 阅读次数:

Flutter Alignment 属性总结和应用(雪碧图)

一. 需求分析

实现一个等级标识组件

20200318000032.png

提供的图片是一张水平方向的雪碧图
20200318000113.png

二. Alignment 属性

这个属性可以让图片的显示位置偏移, 功能类似 css 中的 background-position
调用: Alignment(x, y) , x y 分别表示水平和垂直方向的偏移 , 初始值均为 0
-1 表示图片最左侧 , 1表示图片最右侧
虽然实际上容器是不动的 , 偏移的是图片, 但为了便于理解, 可以认为图片静止, 容器是一个移动的选区 , 确定位置后”抠”出图来显示到界面, 如下图 (虚线框代表容器) :

阅读全文 »
12…6
网中的小鱼

网中的小鱼

写代码的

57 日志
45 标签
RSS
Links
  • 幻凡ss
  • TaylorTaurus’ Blog
  • 快递查询
© 2020 网中的小鱼  京ICP备18042411号
由 Hexo 强力驱动 v3.7.1
|
主题 — NexT.Pisces v6.3.0